RECORDING FUNCTIONS
CREATE A NEW RECORDING.
To create a new recording:
- Select New Recording
- After selection, the Meeting Settings tab will appear
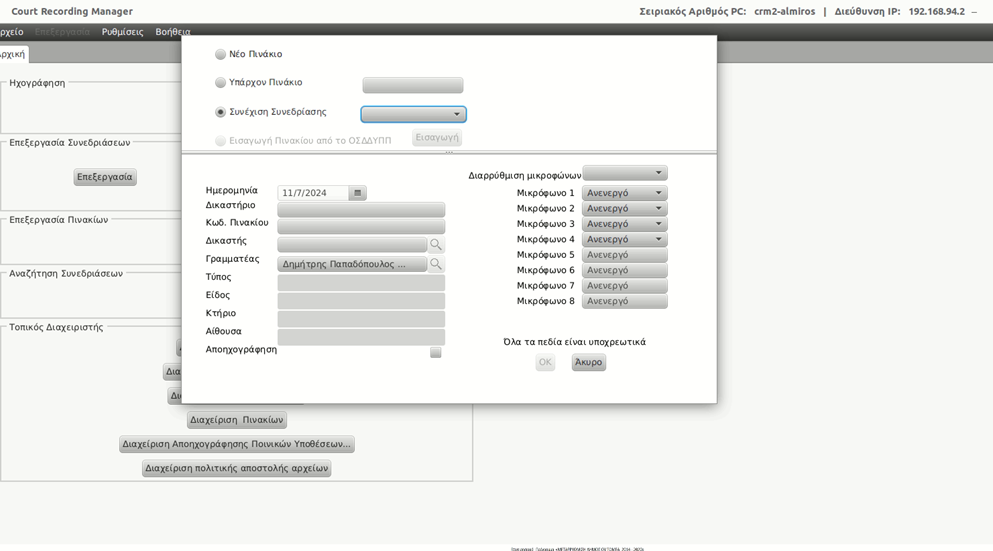
The Meeting Settings tab defines three instances of Recording
- New Panel (new recording for a panel that has not been imported)
- Existing Table (new recording for a table that has been imported)
- Continuation of Meeting
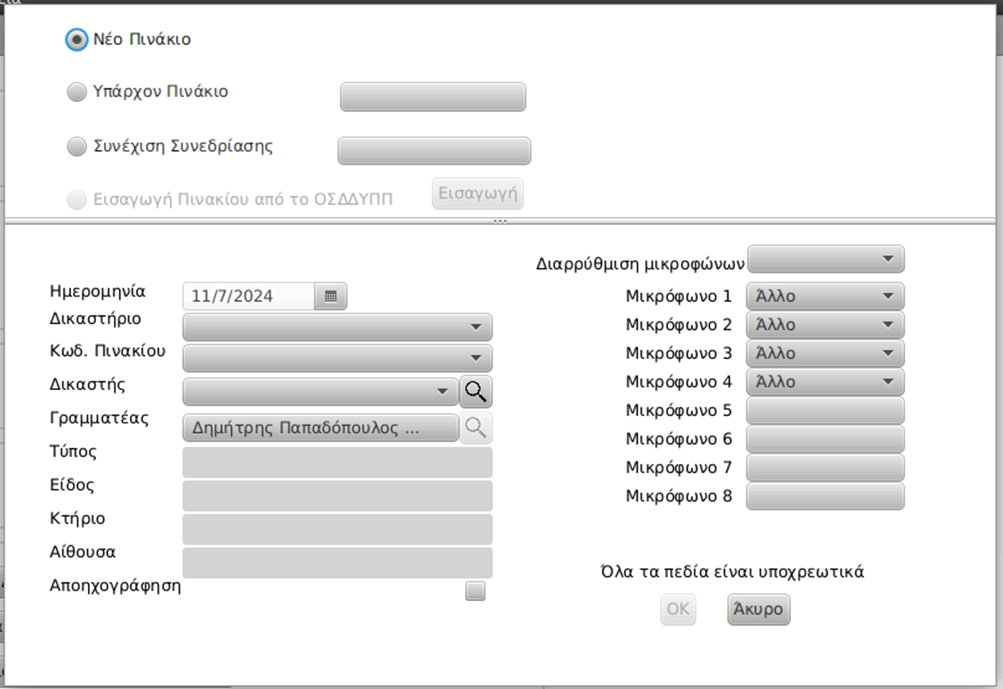
RECORDING WITH A NEW PLATE
To create a new recording for a board that hasn't been imported:
- Select New Board
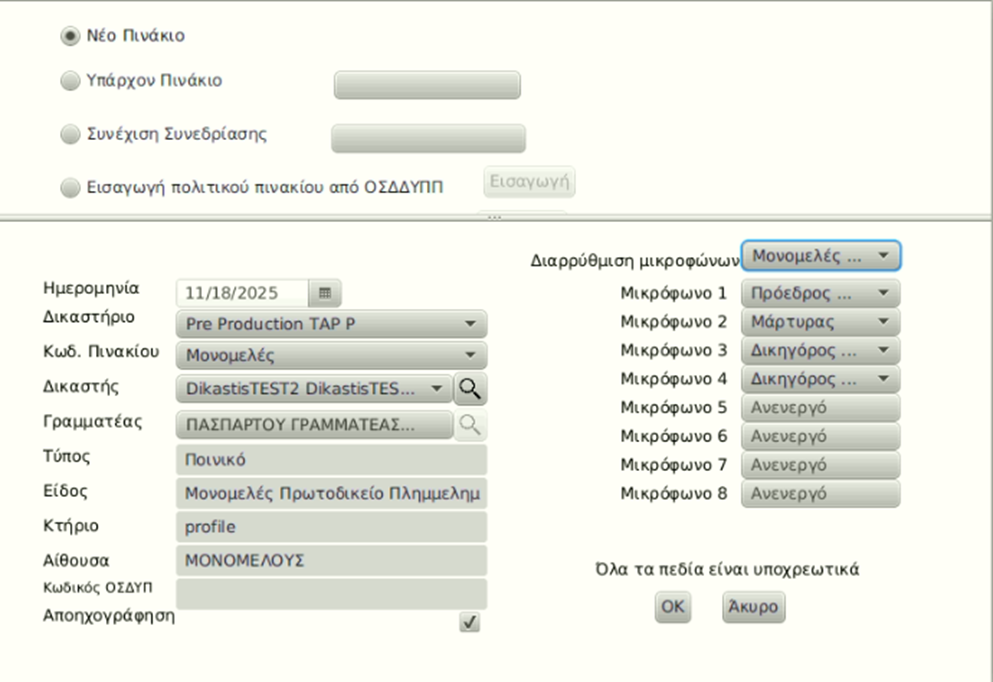
- Fill in the details of the new table as follows:
Date: the date is not active as it always takes the date of entry into the system for recording.
Court: you choose the court you belong to.
Code. Table: select the code of the panel to be recorded. (The type, type, building and room are automatically filled in with the selection based on the table code you selected)
Judge: select your judge from the ready-made list or add a judge by selecting 
Secretary: the name of the registrar who is logged in to the application is displayed.
Audio recording: Check the Audio box (If this field is not checked, the audio of the hearing is not transferred to be recorded)
Symbol  : The magnifying glass allows a user to find and select judges or clerks who are not in the court he has chosen on the list. A user typically belongs to a court, but there are cases where he may have to belong to more than one. If he has been declared to the courts by the C.A.P. then other users will be able to find him and select him from the lists (drop downs). The change is extraordinary and the user has not yet been associated with the new court, he will be able to use the application, but other users will have to find him using the magnifying glass.
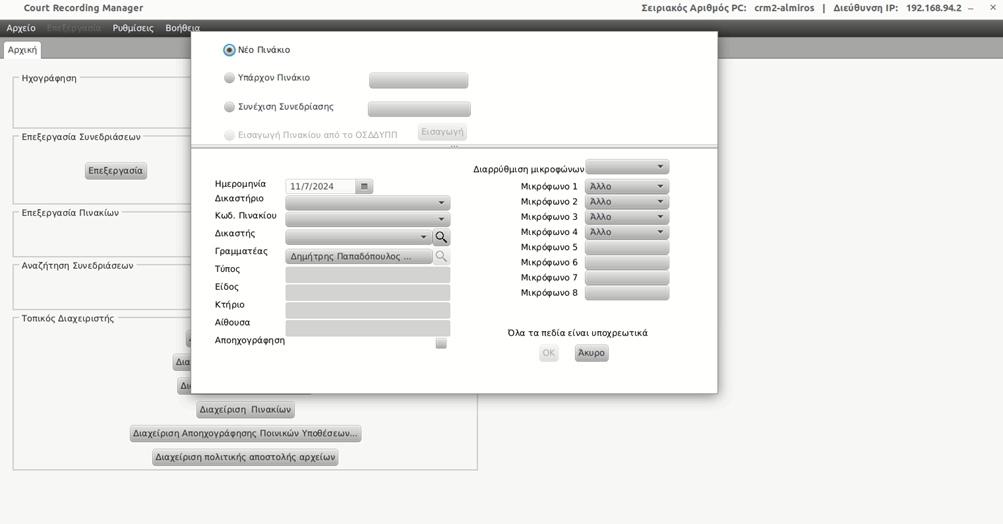
The Secretary field is pre-populated and cannot be changed. In case you have logged in as a judge, the Judge field will be pre-filled. In the case of proceedings with more than one Judge, the recording is made in the name of the one who will try most of the cases in the docket.
Attention: Changes of the Judges must be made in the editing of the panel before the approval of the recording. Otherwise, the cases will be charged to the wrong President.
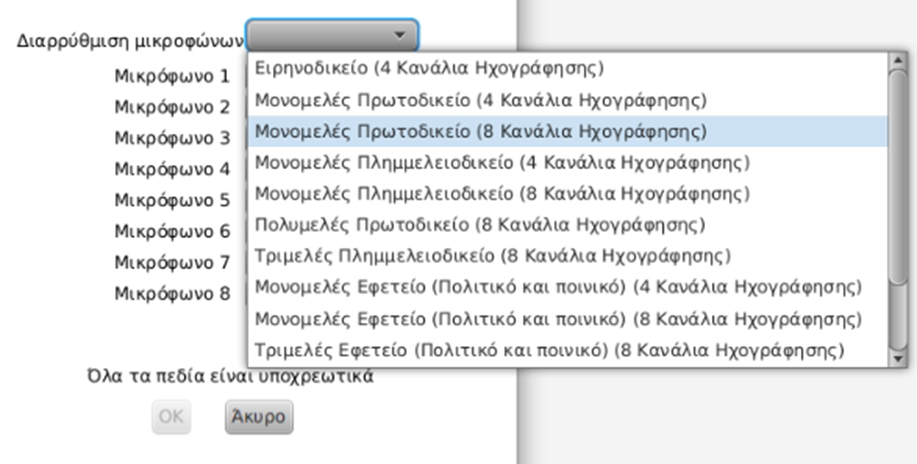
Also choose a hall template. The room standard defines a predefined microphone layout. Once selected, the microphones that are active in that room will appear, and next to it the role of the speaker. You can change values if you want in the speaker role of each microphone or turn it off.
Confirm the creation of a table by selecting OK. The Recording tab will appear on your screen
Filling out the table is an important process and should be done with care. Incorrect data on a board can lead to the recording data not being manageable or even searchable.
In case the table already exists in the system, an error window appears, notifying about the inability to create the table with the specific data. (There is a corresponding table with the same table code and the same President registered for the same date.)
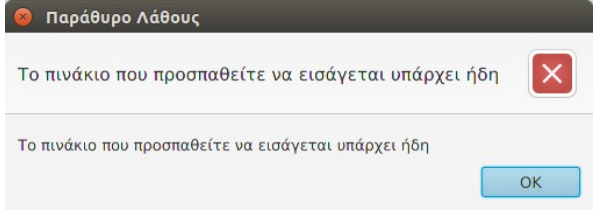
RECORDING FOR AN EXISTING BOARD
To create a new recording for a table that has already been imported:
- Select Existing Table
- Select the table you want to insert
- The details of the table will be automatically filled in according to your choice
- Confirm the creation of a table by selecting OK. The Recording tab will appear on your screen
CONTINUATION OF THE MEETING
The Continue Meeting option applies to those meetings that have been interrupted. To return to the same session after an interruption you should follow the steps:
- Select Resume Session.
- Select the session you are interested in.
- The details of the table will be automatically filled in according to your choice
Confirm the creation of a table by selecting OK. The Recording tab will appear on your screen
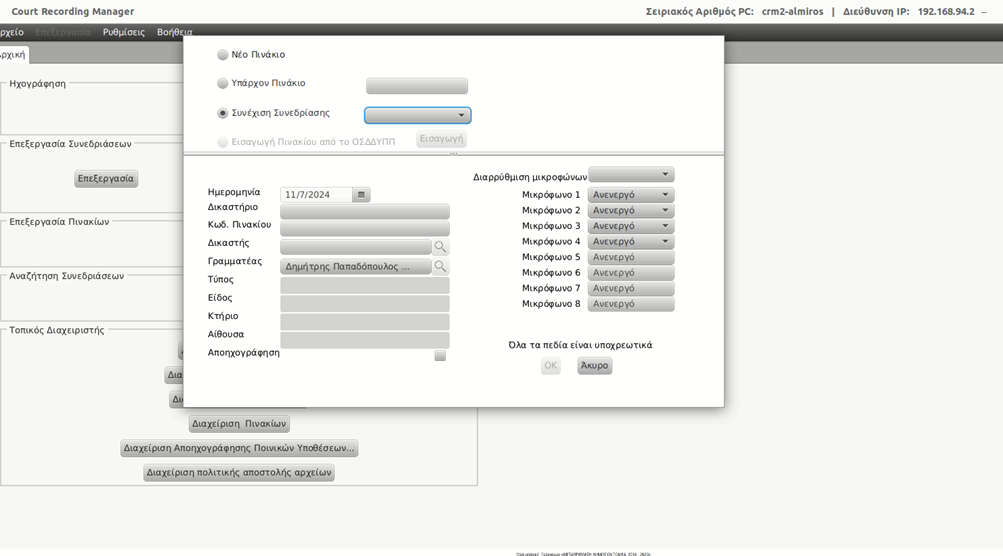
The Continuation of the Meeting is a new meeting on the same table. The recording tab does not contain as many comments and footnotes as you had entered before the interruption.
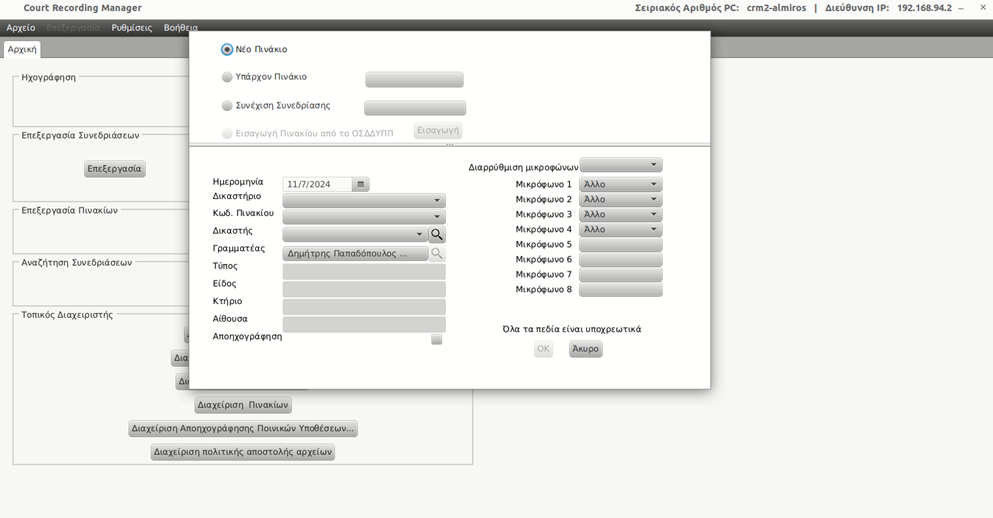
Option for test recording
 In order to proceed with a test recording, it is necessary that the Unrecording field at the bottom left is NOT selected as shown in the image below.
RECORDING START
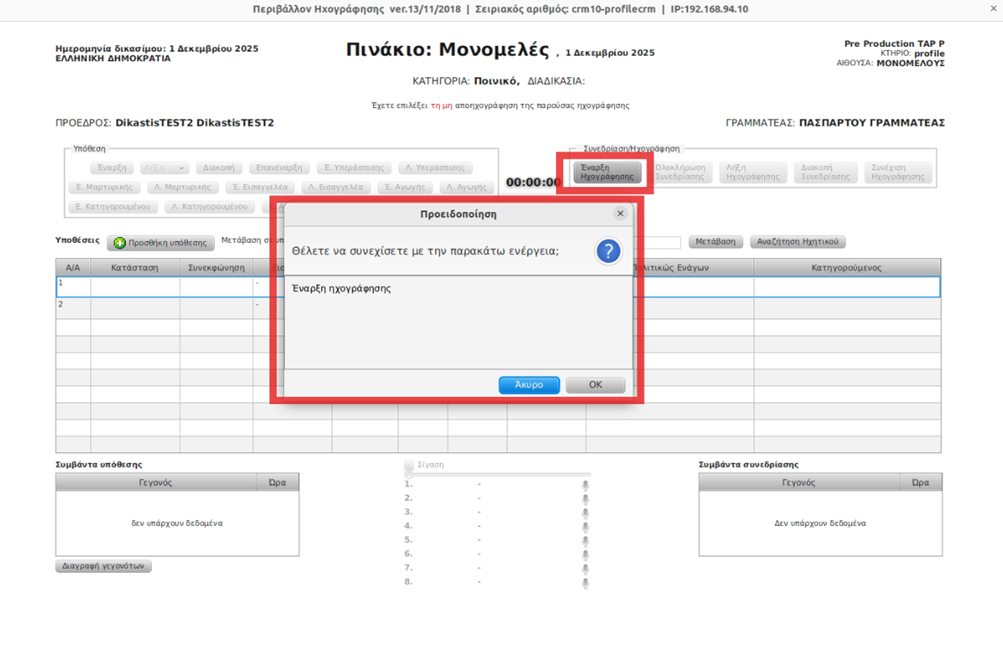
To start a new Recording, on the Recording tab, select the Start Recording button and confirm by pressing OK. If we do not want the recording to start for some reason we select Cancel recording and confirm by pressing OK
END & RESUME RECORDING
To end the recording, on the Recording tab, press the End Recording button and confirm.
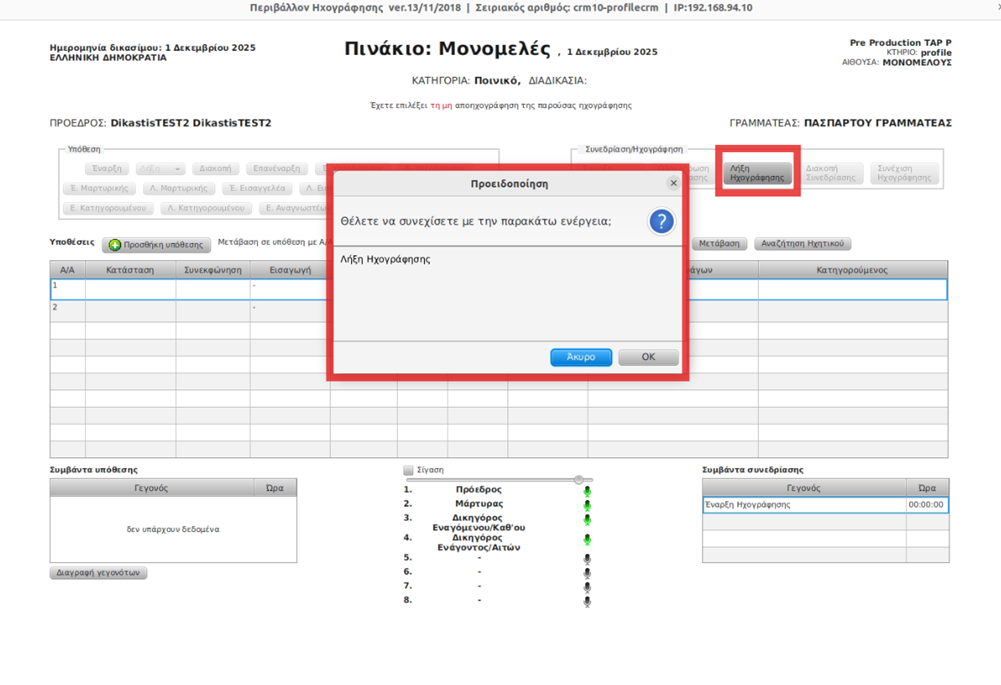
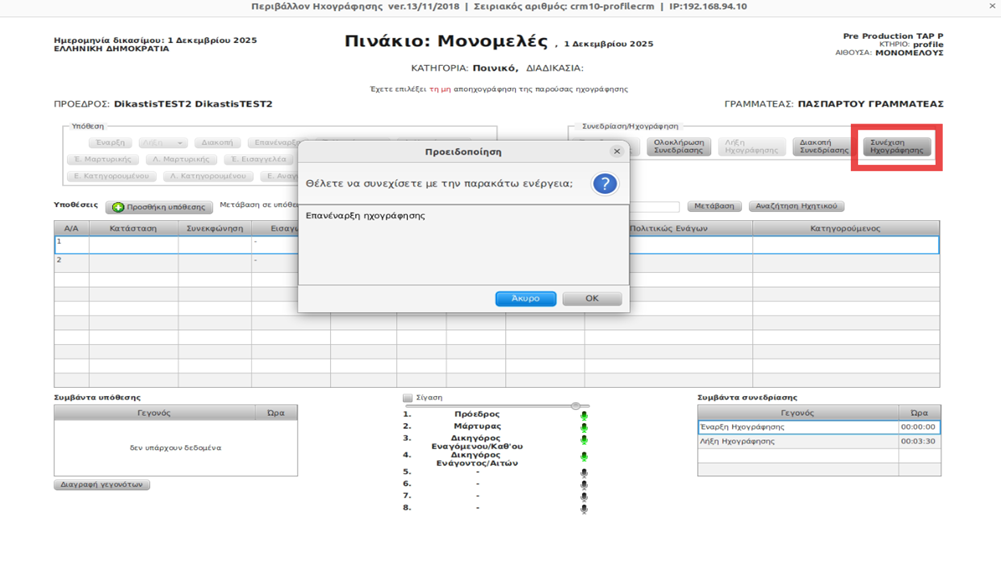
To resume recording, if you have previously selected End Recording, press the Resume Recording button that will have appeared.
OPENING A CASE
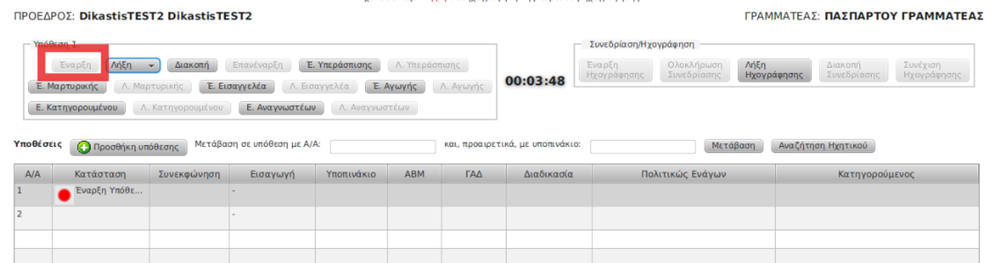
To start recording a new case within the meeting (and inserting the relevant memo), on the Recording tab, you need to do the following:
- From the Case action bar, select Start
- In the New Case form that appears, enter the case number, the way of entry, the sub-license code, Plaintiff, Accused, ABM and GAD and confirm by pressing OK.
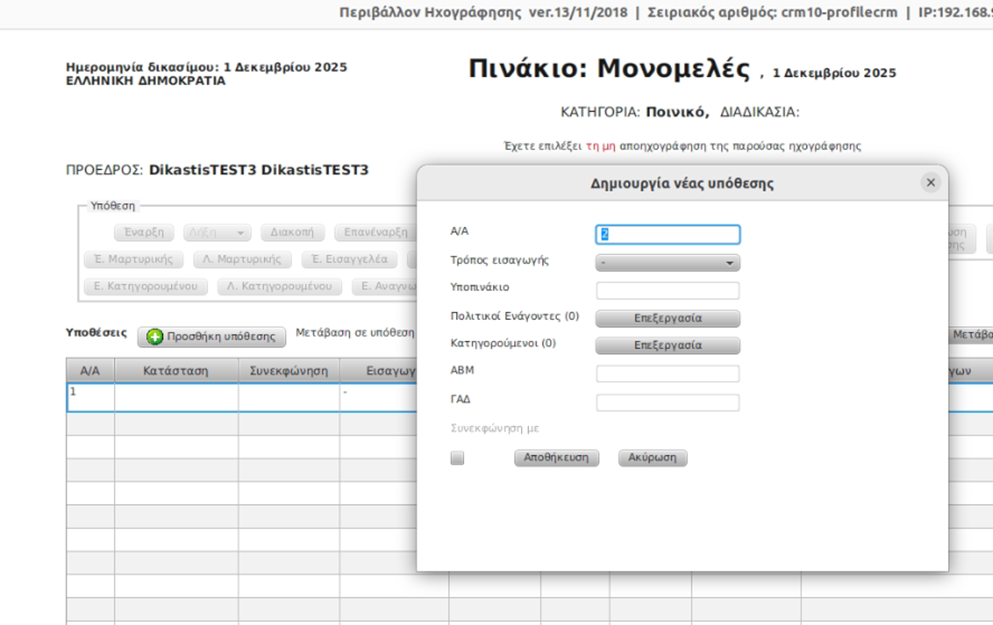
At least those elements that uniquely identify a case should be introduced.
Once you press OK and the case you entered is not on the table, the app will inform you with an appropriate message
INTERRUPTION, RESUMPTION AND TERMINATION OF A CASE
To insert a "Case Stop" legend into the text, on the Audio Recording tab:
From the Case action bar, select Stop.
In the displayed Form Stop Case , the information will already be filled in by the information you had entered at the beginning of the case.
To declare the reopening of a case:
From the Case action bar, select Restart
In the displayed Case Restart form, enter the case number and how to enter and confirm.
To declare the end of a case:
From the Case action bar, select the Expire button.
In the displayed Form End of Case , the information you had entered will already be filled in from the start or resumption.
Do not forget to note the end of cases as well as the result of the discussion, otherwise it will not be possible to separate the recorded dialogues by case
By pressing End Case, the recording CONTINUES. Only if we press End Recording does the process stop RECORDING.
ADJOURNMENT OF A MEETING
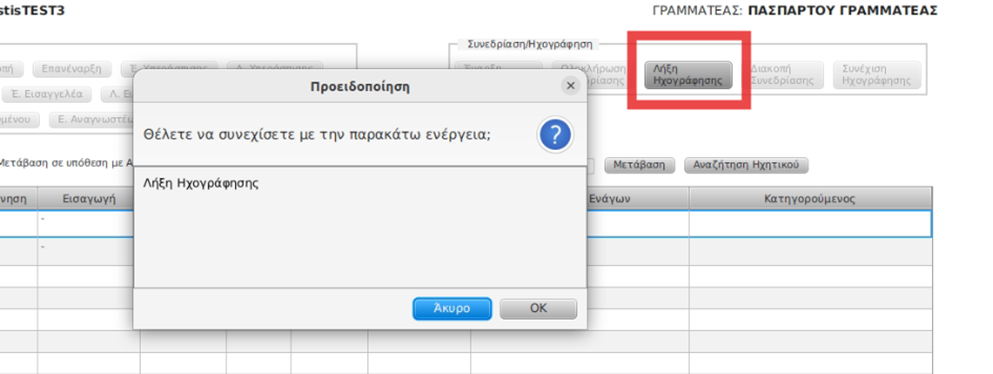
There is a possibility that the discussion of a case or cases of the table will be requested to continue at another time or day. In this case we first select End recording (as mentioned in 6.3) and then to stop select Stop Meeting from the action bar and confirm in the displayed warning message

BEGINNING AND END OF TESTIMONY
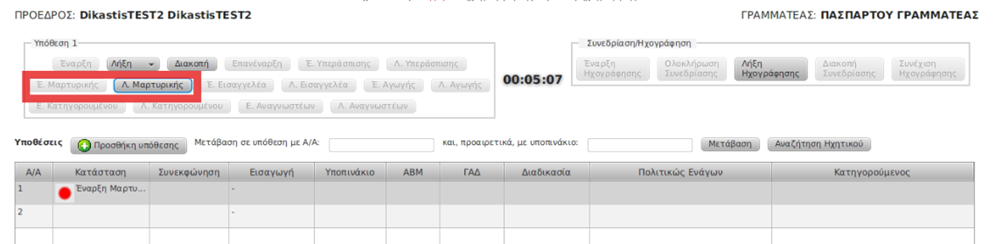
For criminal cases in the recording, there are additional memos in the Recording tab such as the Witness tab. This memo does not have a different function, but it works as an aid for recorders.
In the action bar "Case", there is the action bar "E. Martyrika".
From the Testimony action bar, choose Start when a witness speaks during the recording, and End when they no longer speak.
AUDIO SETTINGS via CRM
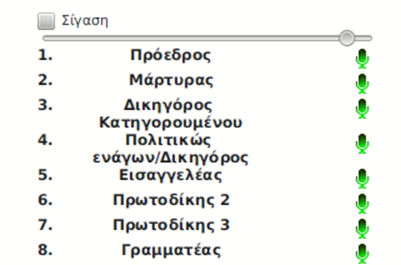
To adjust the sound of the headphones you may be using while recording, you can do the following:
To mute the audio on the headphones, select the Mute button
To adjust the volume on the headphones, increase the volume from the bar
To mute a specific microphone, select the green indicator. Automatically the indicator will appear red.
END OF MEETING
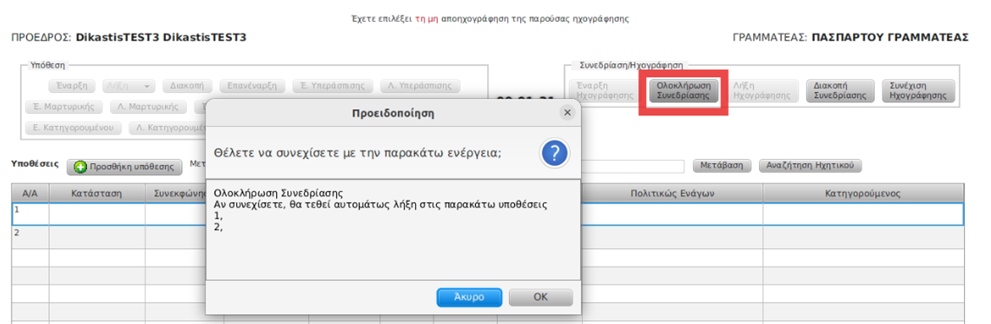
To end the session, select End Meeting and then End Meeting and confirm in the displayed warning message
Choose to Unrecord or Not Record
When do I select Audio
It is important that the recording system is used correctly and that ONLY the sessions that are intended to be recorded are selected for Derecording.
For the meetings that we want to receive in minutes, whether they are civil or criminal, we select the Unrecording field at the bottom left and make sure that the button is selected, having the .  In this way the data is transferred to the TAP ( server ) and from there it is transferred to the derecording.
When I don't select Audio
In any case where a meeting is not scheduled to be recorded, either because I want to make a test recording (TEST) to check the smooth operation of the system or because it is a meeting where the recording is not planned for any other reason (decision of the chair), I make sure that the button next to the Audio recording is NOT selected. In this case, the meeting will be recorded, the audio will be stored in the TAP but it will not be recorded.
 If I find out afterwards that the unrecording button has been pressed by mistake , I must immediately inform the helpdesk , so that the session can be changed to Non-Recording mode.