UNRECORDED SESSION EDITING FEATURES
In this tab, the user can edit the recorded meetings and insert, edit and approve corrections on them.
EDIT SESSION
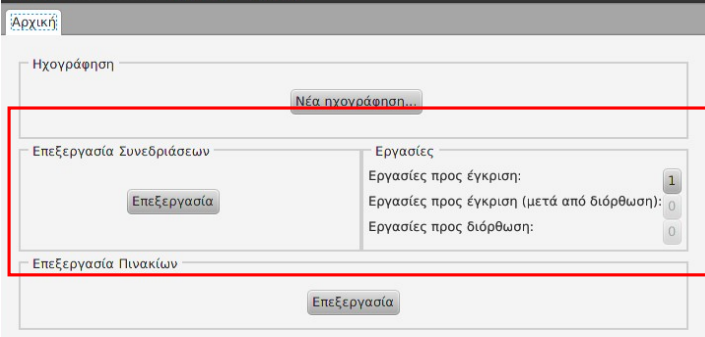
To edit an unrecorded session, select the Edit button from the Home tab menu
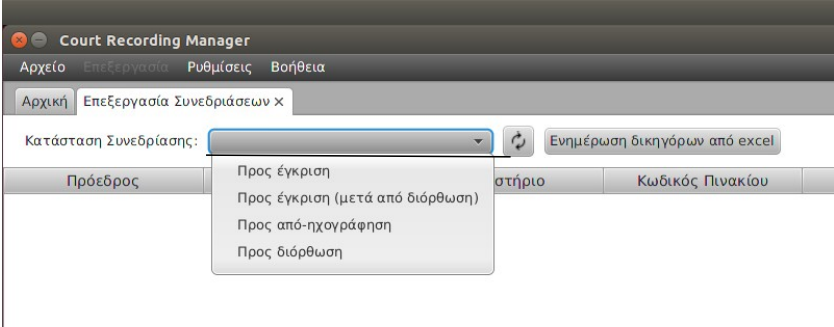
In the Edit Meetings tab you can select the individual meeting to be edited from the menu in the Meeting Status by filtering all available meetings as follows:
To be approved: The recorded meetings that must receive final approval and be transferred to the Central Repository of Minutes
To be approved (after correction): The recorded meetings that have been corrected and must receive final approval and be transferred to the Central Repository of Minutes
To be de-recorded: View our work that is currently in the process of being de-recorded. You see the footnotes of your recording. In these cases, the user is not recommended to intervene if there is no important reason.
To Correct: The unrecorded sessions that have been sent back to the derecording team for correction
Once you've selected the session you want to edit, the View option appears at the bottom of the screen to open your work.
In the Meeting Status, only the information appears in the Tasks to be Corrected so that you are informed about the tasks that are still at this stage. When the Correction is complete, you will be able to receive it from the To Approve (after correction)
VIEW UNRECORDED MEETING TEXT
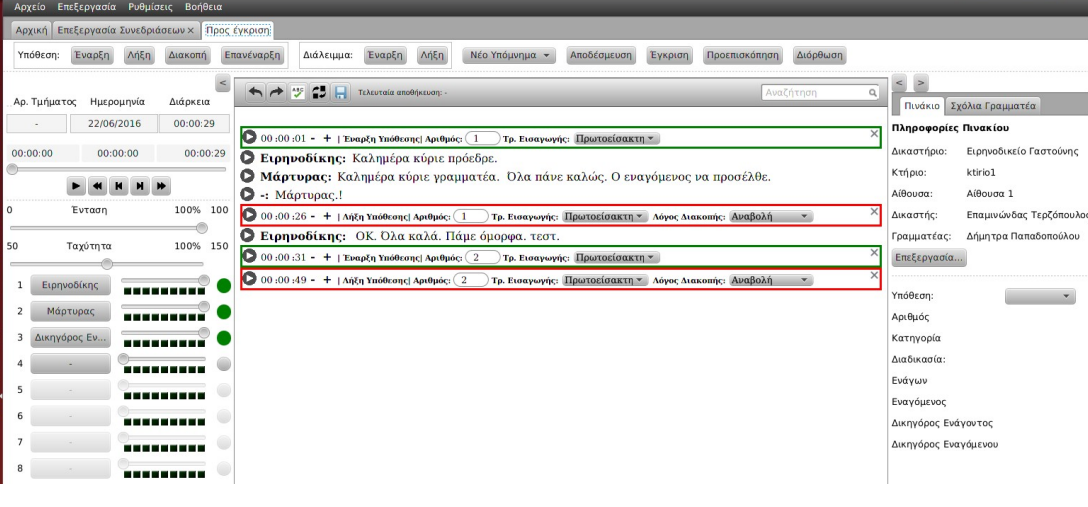
Select View if you want to edit an unrecorded session within the app and save the changes. This option will take you to a screen similar to that of the recording:
PROOFREAD MEETING TEXT
To correct the meeting text you can:
a) Intervene directly in the main text
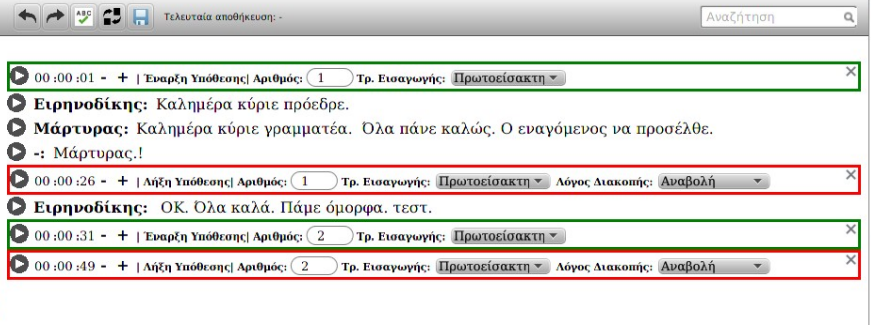
b) Correct the audio intervals exactly as described in section 6.9 Structure of Memos.
c) Enter comments for the attention of the corrector (if extensive changes are required and you want to send it back to the recorders for correction)
VIEW COMMENT AND INSERT CORRECTION COMMENT
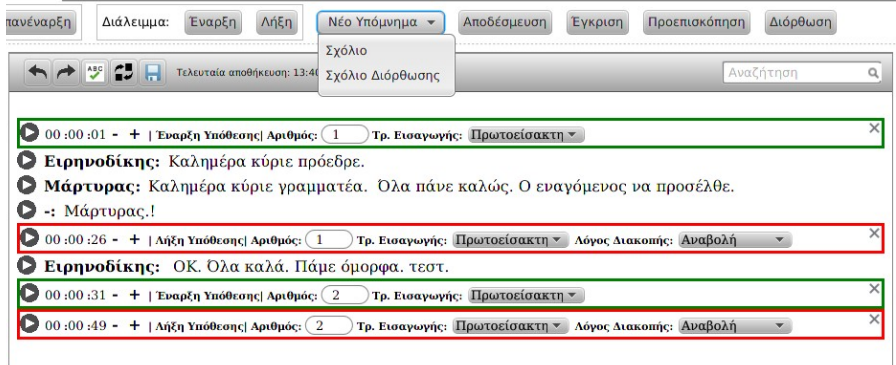
To see the comments that are already included in the derecording (and you entered them during the recording)
- Select the sound interval you are interested in
- Select the Secretary Comments field
To enter your own correction comment, follow these steps:
- In the New Legend options menu, select Correction Comment
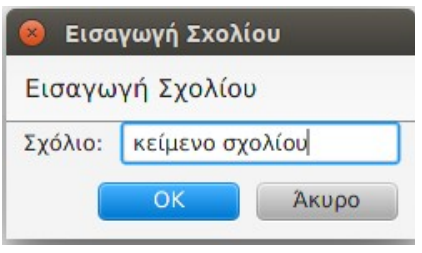
- On the Insert Comment tab, enter a comment and confirm
SPELL CHECKER
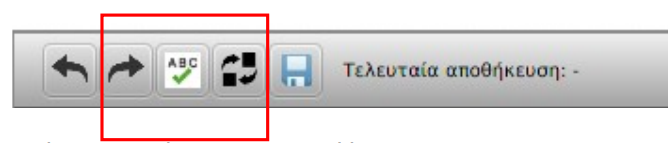
To check the spelling of the text, select the text you are interested in, and then select the Spell Checker icon.
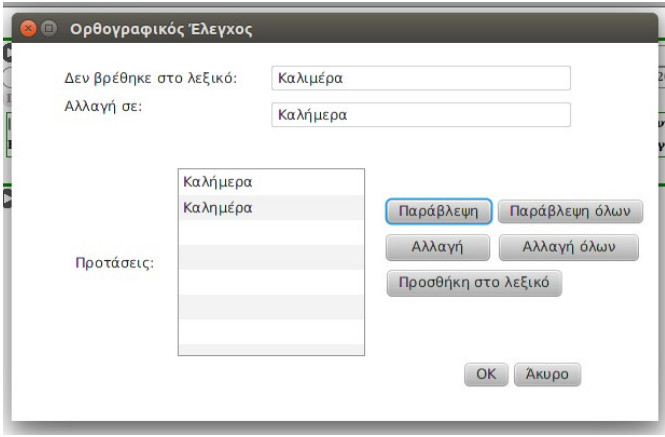
The Spell Check dialog box opens
- The window displays the first word that has been detected as a mistake
- Select one of the Suggestions to correct, then Change or Change all
- Select Ignore or Ignore All if you do not wish to correct the word
- If a correct word appears as incorrect, press Add to Dictionary . After adding it, it will not appear again as an error. If you want to remove words from the dictionary, select Settings-Dictionary-Manage dictionary words. Select the word or words you want-Delete word and OK.
- Press OK to confirm or Cancel if you don't want the changes to take place
SAVE CHANGES
To save changes, whenever you deem it necessary, select the Save icon or press the shortcut Crtl + S. Changes are saved automatically every 1 minute or so.

TEXT SEARCH
To locate specific text:
- Enter the text you want to search in the Search field. You can go to the search field by typing Ctrl +f
- The system will detect the length of time the text exists and color it brightly.

TEXT REPLACEMENT
It is possible to replace a specific part of the text or words:
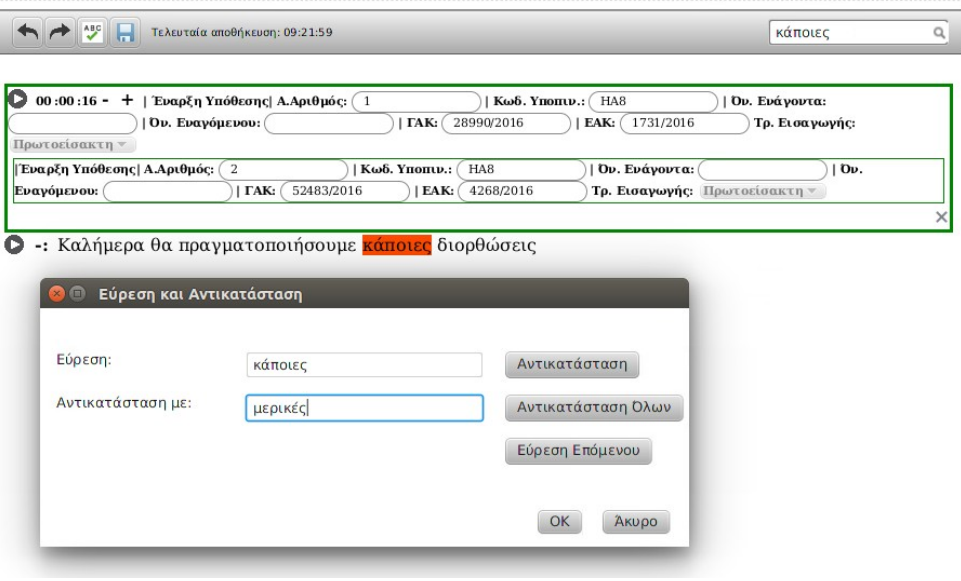
- The Find and Replace dialog box opens.
- If you are in the Find field, select the Enter key to search for the text you filled in the field.
- Each piece of text that identifies as the search text is highlighted in yellow. The section highlighted in orange indicates the current search term.
- To replace the selected text segment in orange, or the first segment that identifies with the search if there is no selected text segment, enter the change in the Replace With: field and select Replace
- To replace all pieces of text that match the search text, select Replace All
UNDO
To undo the changes that have been made, select the Undo icon

In case of text entry, the action is considered to have been taken before pressing the last enter or the last 5 space bars that have letters between them. Undo can be done for the last 15 actions.
UNDO CHANGE UNDO (REDO)
To retry the changes that have been made, select the Retry Changes icon

An undo can be done for the last 15 actions.
APPROVAL OF THE TRANSCRIPT OF THE MEETING
Select Approve to approve a session after you've reviewed and corrected it.
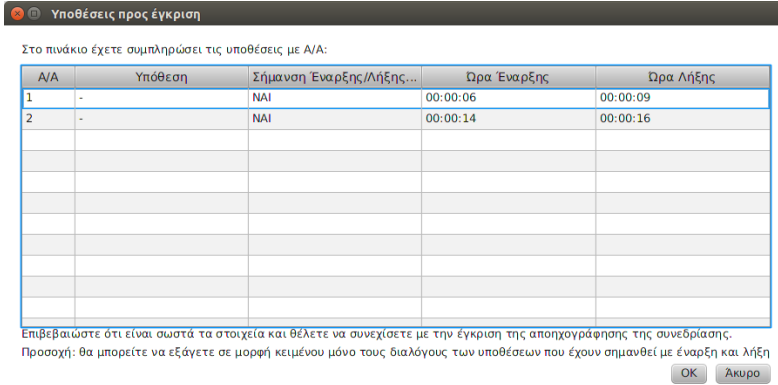
- An information table appears with the cases that will be available on the portal
- Confirm by pressing OK.
ATTENTION: After the approval of the recorded text, your cases are now only available through the portal and you cannot make changes to their details. Pay particular attention to the details of the cases you have entered in the list as well as to the Judge you have appointed for each case.
SEARCH MEETINGS
The option to search for meetings allows us to search for the audio file of a hearing that we had held as secretaries. We select the time interval from - to refresh to display the results we are looking for. We select the trial and View to find ourselves in the playback tab. Now we have the audio at our disposal.
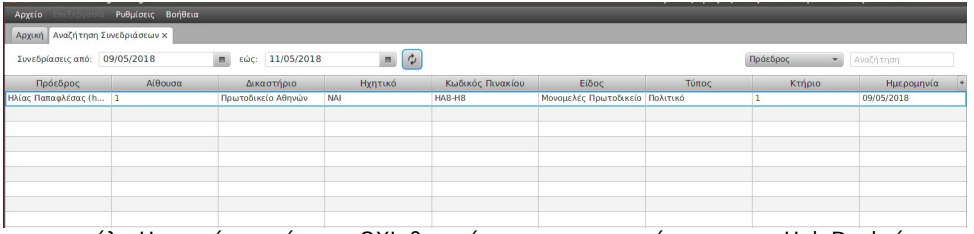
After you have opened the playback tab, the case that concerns you is selected and you are transported to the corresponding time through its markups.